However I was still having a few problems displaying captions underneath my images in IE and Safari – in a nutshell weird things were happening with my image alignment…
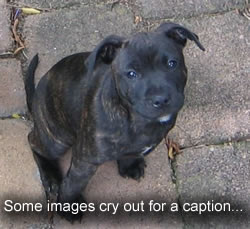
Cute isn't she?
Step 1 – install the CSS in your Blogger template
Go into your Blogger “Layout” page and select “Edit HTML.” As always – make sure you save a backup copy of your template before fiddling about with your blog’s innards hehe.
Find the </b:skin> tag and insert the following code just BEFORE it:
.left-caption { float: left; clear: left; margin: 0pt 10px 3px 0pt; padding: 0.5em; text-align: center; } .right-caption { float: right; margin: 0 0 1em 1.5em; padding: 0.5em; text-align: center; } .center-caption { margin: 0 0 1em 0; padding: 0; text-align: center; } .left-caption img, .right-caption img, .center-caption img { margin: 0 auto; display: block; } .left-caption p, .right-caption p, .center-caption p { background: #eee; margin: 0; line-height: 1.6em; padding: 0.5em; border-bottom: 1px solid #ccc; border-top: 1px solid #ccc; font-size: 0.9em; color: #333; } |
|---|
Now save your template.
Step 2 – tweak your post images
Now whenever you want to include an image with a caption inside a post you need to click the POST option “Edit HTML” and add the following:
<span class="right-caption" style="width: (image-width)px"><img src="http://www.yourwebsite.com/yourimage.jpg"/><p>Your caption goes here.</p></span> |
|---|
The above code will align your image and caption to the right. You can change this by substituting either the left or center caption classes.
Attention: if you upload images to Blogger choose “NONE” in the layout option.
Also make sure you give your image a width – substitute a number in the code above where I have (image-width) – it could be “width: 326px” for example. This is very important and will stop all of the IE and Safari browser alignment weirdness that I mentioned earlier.
And of course be sure to add the correct image URL, not the one I included above.
Please note: remember to factor in image borders and padding to your overall image width i.e. if your image is 320px wide, has a 1px wide border and 2px of padding this will add 6px onto the overall width taking it up to 326px.
Feel free to tinker with the CSS if you want, you can easily change the background color of the captions and so on. Just save your template first!
To summarize:
- We defined some classes inside our Blogger template (i.e. left-caption, right-caption, center-caption).
- We applied preformatted styling to these classes.
- We applied this to the images inside our posts using span tags.
Thanks, Julian, for the tip. It must be one of the simplest I've found so far.
ReplyDeleteI think the omission by Google to put in a caption-adding feature is seriously damaging Blogger's reputation while at the same time making life excessively difficult for non-techies. For example, my wife just started a blog about our home town, where (obviously) pictures play a big role. She doesn't know the first thing about HTML coding, so it's a real pain for her to get the captions anywhere near right.
Do you know if there's a pressure group about the captions in Google's direction? After all, blogging is all about content, not code.
Cheers,
Kimmo
Estonia
hello hello hello! It's Mr Schoffel :) There I was searching for ways to caption pics in Blogger and who should turn up!
ReplyDeleteI need some help with this Julian. I followed the instructions but all I get coming up in my blog is the caption, not the image.
Firstly Blogger won't let me put that css stuff in the template before that b:skin tag. When I save it moves the square brackets that are immediately before the < and should be before the css, to after the css like this ]]>< ... I can't put the css between the >< Is that a problem?
Also you don't make it clear if you have to upload the image via Blogger as well or just host it somewhere. If I just use a host and don't upload through blogger I get no image. If I upload through blogger, the image just sits on top of the page and doesn't do anything that the css is telling it to do.
Pretty frustrating! :)
Hi George,
ReplyDeleteI'm going to do an updated version of this article but I can assure you it does work.
You don't have to put the CSS directly before the skin tag so long as it's somewhere in there with your other css - try putting it above the #footer-wrapper if you like.
It doesn't matter whether you upload the image via Blogger or host it somewhere - if you do the former - just make sure you upload with no formatting.
I hope you are well mate, good to hear from you btw.
If you still have problems send me an email and I will see if I can solve it.
captions for facebook
ReplyDelete